Wind powered ball mill for black powder.
It took me 30 minutes to throw this together. I used basic tools, every day items you can find easly. The follwing is mearly a demonstration of what is possible. The can size is great if you don't shoot regularly.
Find a campaign sign and cut to four equal stripps. Use the mounting wire to make eight long separate rods.
Find a 2/4 or 3inch diameter wood log and cut a wood block (2x2" in this case). At the very center drill a small hole just too small for 3/8 stock power shaft.
The wood block had two holes, just too small for the campaign mount rods, drilled 90 degrees, in pairs, off set, for a total of eight, rounding the wood block. Hammer the mounting rods into the wood.
When sliding the sign peices onto the mounting rods, use the first hole on the "propelling blade" for the first mounting rod of the pair, as shown.
The blades could be glued down to male a much more robust propeller as in my case, they tend to want to slide off.
The milling can is an old plastic vitamin bottle. I dont want plastic milled into my powder so I cut a side of a envelope, rolled it, and put it into the empty bottle so it would open and line the inside of my milling can. Use thin cardboard in stead.
Wrap your can with copeious elastic.
Make your base by using 360 small swivel wheels nailed to a 2/4. You can use straight wheels or larger wheels, for varous can sizes or whatever you may have available.
The base should be cut to fit the can.
Leaving space, rough screw two blocks of 2/4 to both ends of the 2/4 base block.
Find a sweet spot lockation for your power rod dowel to sit. You want it as directly under you can when spinning as possible, but not so far directly under the can, the can becomes unstable and falls off.
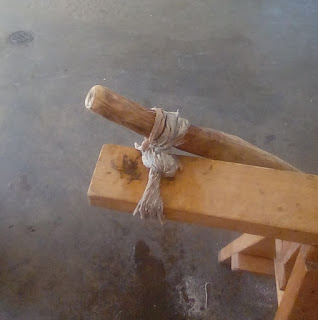
In this case, the power rod, 3/8 stock steel rod was cut to apropriate length. On one end i used the diamond cutting disc to taper the tip, slighlty and then cut four, rough grooves arround the rim. A hole was made center in the proppeller block and the 3/8 taper rode end, gently hammered snug in.
The power rod with the prop. on the end was slid into the upright blocks drilled hole, which you want just larger than 3/8s, grease the holes and the mill was ready.
I added a paper towel (not shown) wrapped around the power rod, where the can would sit and secured with some elastics; this would increase the speed the can would turn; i should come up with a more permanent and symetrical solution to adress this problem.
Set the mill and forget it.