
The Sinew Bow String -Braid (not twist) method. And Repair.
Braid or twist? I don’t think in terms of strength it matters. But the braid methode can be repaired.
The string making task begins at butchering. One must take care to harvest the sinew strands in as long a length as they are offered. The backstraps, spine sinews between the bone and strap, leg sinews, and shoulder blade muscle sinews work well. The sinews must be followed through the muscle meat and removed whole, then the meat preserved and saved in some form or another; I prefer dehydration.
Under no circumstance or at no point, is sinew to be hammered; doing so damages the fibers. Soak well, then work the once dried sinew with an awl to separate the strands.
Many sinew fibers are actually just a bunch of really small fibers overlapping. The shoulder, backstrap, and a few others are ideal as they are continuous threads. Dont get too picky on the sinew threads though, as long as they are long.

An awl is used to split the thick strands of tendon into manageable fibers. Short fibers which separate away while selecting and separating the longer more appropriate strands, should be saved and cooked. Longer strands make better strings as there are fewer "linking" points allong the finished sting.

Once the sinew strands are harvested and have been reconstituted if dry, begin by braiding three long stands and or bundles of fiber of appropriate width.

When the braded string is about 10 inches long, make the first loop. Loop the start of string around and undo the end braid so the sinew fibres are separate again to about 2 inches; these separate fibers are then weaved into the braid at about an intch and a half from the end of the sting (or "loop tip"). The point where said undone fibers are weaved back into the braid is dependant on how large you want the final loop to be.


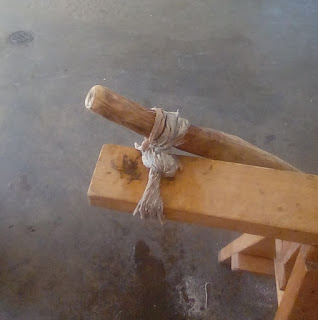
The loose, un woven fibers on the end will be pushed through holes made in your braided string by an awl. The awl will also be used to guide/push the fiber through said holes. The best awls for sinew work are bone.
When the fiber have been pushed through the hole, pull it through with your fingers and tighen everything up. Do this after pushing each of the loose sinew strands/bundels of sinew through the string weave. Continue until the unwoven fibers are woven into the main string again. The holes neednt be located in any specific order, location, or design; just dont weave a strand too far down the string. The point is to just get those loose ends tangled into the braid weave in descending holes. It wont take much weaving once the fibers are dry to have created a loop that will keep long after the string its self has failed under a load.
Once your first loop has been made it helps to hook this end to a stationary location so when you continue braiding the rest of the string you can make a neat, tight braid by tugging the string taught while your fingers braid.
I have described how to braid a sinew cable in previouse posts, but to repeat, when you are nearing the end of a strand (of your three used to make the braid) simply overlap a new sinew strip, about an intch before the previous one ends. The braiding of sinew fibers is a skill that should improve quickly with a little practice.
Once you have determined and reached the desired lenth of your string, loop the end around and fix it back into your cable to make the second loop, just as the first was done. Remember to make the string shorter than you need for the bow while strung as the sinew string will stretch during the next step. Knowing how long to make your bow sting takes time to figure out; this is a problem which is exacerbated by the tendency of wet sinew string to have strech during the loaded/drying/settling step.
It must now be dry while on a load; this will settle all the fibers and make them work as one, strong, non stretching dry cable.
After two days, the string should be completely dry and the load removed.


A well made sinew string has a long service life if you keep it dry. They can take a great beating certainly rivaling a nylon one. Maintenance includes rubbing the string with wet bone broth or thick hide glue regularly.
The following article finishes with a loop on both ends of the string; this is very hard to do as you must make the cord just the right length or near it. Many people simply use a knot of one type or another to finish their natural cord strings as this can be undone to suit the bows needs; an aproach i am going to take up more often for my new strings; if that an approach you want to try, omit the step that involves making the final loop, and finsh with a simple knot to hold the frey.
The string making task begins at butchering. One must take care to harvest the sinew strands in as long a length as they are offered. The backstraps, spine sinews between the bone and strap, leg sinews, and shoulder blade muscle sinews work well. The sinews must be followed through the muscle meat and removed whole, then the meat preserved and saved in some form or another; I prefer dehydration.
Under no circumstance or at no point, is sinew to be hammered; doing so damages the fibers. Soak well, then work the once dried sinew with an awl to separate the strands.
Many sinew fibers are actually just a bunch of really small fibers overlapping. The shoulder, backstrap, and a few others are ideal as they are continuous threads. Dont get too picky on the sinew threads though, as long as they are long.


An awl is used to split the thick strands of tendon into manageable fibers. Short fibers which separate away while selecting and separating the longer more appropriate strands, should be saved and cooked. Longer strands make better strings as there are fewer "linking" points allong the finished sting.

Once the sinew strands are harvested and have been reconstituted if dry, begin by braiding three long stands and or bundles of fiber of appropriate width.

 |
| This cable had many short fibers and hense the "freying" seen in the loop section. A cable using longer sinew strands would be thinner and have less "freying". |
When the braded string is about 10 inches long, make the first loop. Loop the start of string around and undo the end braid so the sinew fibres are separate again to about 2 inches; these separate fibers are then weaved into the braid at about an intch and a half from the end of the sting (or "loop tip"). The point where said undone fibers are weaved back into the braid is dependant on how large you want the final loop to be.


The loose, un woven fibers on the end will be pushed through holes made in your braided string by an awl. The awl will also be used to guide/push the fiber through said holes. The best awls for sinew work are bone.
When the fiber have been pushed through the hole, pull it through with your fingers and tighen everything up. Do this after pushing each of the loose sinew strands/bundels of sinew through the string weave. Continue until the unwoven fibers are woven into the main string again. The holes neednt be located in any specific order, location, or design; just dont weave a strand too far down the string. The point is to just get those loose ends tangled into the braid weave in descending holes. It wont take much weaving once the fibers are dry to have created a loop that will keep long after the string its self has failed under a load.
Once your first loop has been made it helps to hook this end to a stationary location so when you continue braiding the rest of the string you can make a neat, tight braid by tugging the string taught while your fingers braid.
I have described how to braid a sinew cable in previouse posts, but to repeat, when you are nearing the end of a strand (of your three used to make the braid) simply overlap a new sinew strip, about an intch before the previous one ends. The braiding of sinew fibers is a skill that should improve quickly with a little practice.
Once you have determined and reached the desired lenth of your string, loop the end around and fix it back into your cable to make the second loop, just as the first was done. Remember to make the string shorter than you need for the bow while strung as the sinew string will stretch during the next step. Knowing how long to make your bow sting takes time to figure out; this is a problem which is exacerbated by the tendency of wet sinew string to have strech during the loaded/drying/settling step.
I have been expirmenting with sinew strings and a string too long is always better than one too short - of course. Work the long sinew end and make it fit the nock of the other limb one way or another; all you need is for it to hold. Alternativly, you may only make one end with a strong loop and work your finished string with some pliers, once dried, to make some sort of strong nott loop for the other limb end - like a bowyers nott.
You should with a braided string, now soak the whole string in hide glue.
It must now be dry while on a load; this will settle all the fibers and make them work as one, strong, non stretching dry cable.
 |
| That is a full 18L bottle. This cable could likely hold two or more of these water jugs. |
After two days, the string should be completely dry and the load removed.
On that note, your string will need a arrow guard where the knock will repeatedly sit. I use a strip of pre soaked buckskin (if your arrow nocks will accommodate it) and wrap it around; then use sinew to wrap over it. Finish with a thorough saturation of hide glue for the whole string.
If the string fails on or near the center, soak the two end until well saturated. Undo the braid for an inch and re braid or re weave the loose ends in to the other strings braid with an awl. Then weave the other strings loose ends into the first strings braid. These weaves can be randome, but try to keep the whole repair tight.
If the string dries too much while repairing, soak it in water for a little while, then continue.
When finished, soak the repair with hide glue and dry under load.
A well made sinew string has a long service life if you keep it dry. They can take a great beating certainly rivaling a nylon one. Maintenance includes rubbing the string with wet bone broth or thick hide glue regularly.
