Brain Tan A Deer Hide like A Genius.
Tools:
Knife
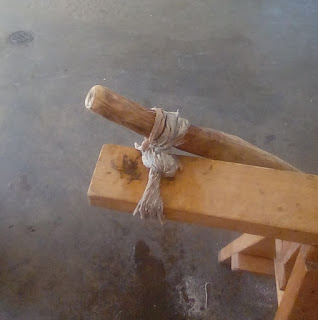
Beam (wood log about 4 ft long)
Bucket
Tablespoon of lye crystals (find at hardware store or soap store)
Shower stall (helps)
Two table spoons of veg oil
Half a cup of shredded soap
Scraper (I use a very, very dull drawknife)
Deer hide
- Avoid the use of hardware-pine lumber in the working of your hides, as this wood supports the growth of a black-speckled mold that tends to jump to and destroy hides.
1) Skin the hide—avoid knives. Knives will score the hide, which will become weak spots on the garment. If you use a knife—which I do—be careful, take your time, and try dulling the tip well that is slicing. Take your time to leave behind as much meat and fat—don't waste good food or get it filthy before discarding it to animals—they are no more resilient to toxins than you.
2) The hide off, you can either sun-dry it for storage, flesh side up over a beam, or when ready to carry on, freeze it (which I don't recommend for many reasons) or hammer through. A hide that is off a deer is extremely forgiving. Don't worry about rot—within reason. You can leave it bunched under a tree for several days in this state if you need to. If the hide will be scraped within a few days, throw it in some cold water. Have a soaking hide—of just water—before you scrape; the soaked hair floats around in the air less and is easier to clean up after. If you dried it, you will need to soak it fully in water for a few days to proceed.
3) Throw the hide over a beam and scrape. DO NOT USE LYE TO HELP REMOVE HAIR. I have tried rotating slightly to help slip hair. Yes, the neck and spine will be difficult to scrape and remove hair—deal with it. Lye will waste on hair follicles instead of the skin and will make the hair caustic to animals. Scrape the flesh side first.
4) Put scraped hide into a bucket and cover with water. Mix lye with some water in a jar and add to the bucket. Wash the jar immediately. Mix the hide and water. Make sure the hide is submerged and the bucket is covered. You can leave the bucket like this for about a week. It won't rot, is what I'm saying. The lye will keep the hide sterilized. Mix once daily.
5) After three days, the hide will be puckered. Take the hide bucket to a shower stall. Rince the hide well. Put a rag on the end of the scrape beam and another rag between your body and the hide surface. With the managable beam, scrape the hide in the puckered state so you remove any remaining surface gunk on both sides. Use care, as the hide is vulnerable to cutting or breaking in this state; at the same time, the whole idea of scraping it now is to obliterate the fiber bonds and tear the hide loose through manual force. Scrape downward and then pull sideways. You will notice the hide change from being stiffish—as it is swollen with water—to stretchy by the end of this step. A lot of gunk will also be squeezed from the hide during this step. DO NOT do this outdoors or somewhere animals will be exposed to the caustic lye chemicals that will come from the hide; do NOT think this is fine.
6) Throw the hide back into the bucket and repeat this wait-stretch-in-shower process until you feel the hide is thoroughly thrashed to a loose hide.
7) The hide must now be fully rinsed of gunk and lye solution. Take it to the shower and rinse and scrape; soak (now in fresh water only); scrape; and rinse. Once the hide starts to look like a wet white hide and not translucent, throw it in a bucket of water.
8) The shower step broke the fiber bonds to the skin's core; the next step of pole wringing will make the final hide as stretchy as possible. The hide must now be cleaned of base solution and returned to a neutral wet white hide. Put the hide in a bucket of clean water and soak for some time (day?). When ready, throw over a horizontal bean. Flap the rope end over the beam, and then overlap back over with the neck side. Curl the left side to the center, then the right. You should now have a doughnut thing on the pole. Put another pole through the hole and twist—slowly—so the layers don't slide undone. Wring the hide of the water. Twist clockwise, then counter. Turn the hide a quarter and repeat. Repeat until the hide is well wrung. Undo the loop. Stretch the hide open again with your hands. Fold hide in half, neck to tail. Put one leg side over the beam and loop the other side of the hide over it. Curl to the center both ends and twist wring; this step will stretch the hide sideways as opposed to the previous wringing, which stretched the hide lengthwise. Undo the loop and throw the hide in clean water for a day. Repeat this wrung soak until the hide has been heavily broken and stretched, feels tacky when damp instead of slimy, and is well cleaned of slimy base solution. The process until now should turn a bloody, hair-covered hide into a white, hairless, tacky, but stretchy hide; this stretch is different from the original hide in that the overall stretch has increased greatly and has no want to return to the original skin shape.
9) On the final rinse, leave the hide damp and not soaked with water. Prepare the softening solution. You'll need about 45 ml of vegetable oil and half a bar of grated soap blended into a slurry with about two cups of water. Mix the solution into about 3 liters of water. Put the damp hide into the mixture and massage the skin into the liquid. Allow it to absorb the milky slurry for a day or so or expedite it by massaging the hide in the liquid and wringing sooner.
10) Pull out the wet hide and lay it over a beam, leaving the bucket underneath to catch the falling liquid. Wring the hide just as you did to clean out the hide of the base solution—the process will less serve to stretch and break the hide and is now about moving and shifting the fibers against each other to distribute the softening solution.
11) Take the hide off the beam and stretch the hide open using your hands. Massage into the slurry and let soak again for a day or sooner as mentioned above. Repeat the wring, soak, and wait process three times at most, but two is usually fine, waiting a day in between. Keep it cool.
12) Now is the final wring step AND hand dry. You must have a few hours to dedicate to completion. Having a room with a hair dryer or other dry hot area will speed up this step, but you cannot leave the hide damp, as a black mold can take hold here and ruin the hide. On this final ring, stretch open with your hands one last time. With the hide now stretchy and damp but not soaked, covered in oil solution, it should be porous and milky white. Stitch the holes over an inch wide if there are any. To do this, I simply use a thong made of the same material using a whip stitch. Smaller holes are stitched after the hide is smoked by stitching and soaking the area, then drying flat.
13) The hide is ready to be worked by pulling and reaming over a sharp wood beam. This can last a few hours or eight, depending on the environment. You can rest now and then, but with deer, the work should be continuous. If you need to stop for a short break, roll it tight, throw it in a bag, and put it in the fridge.
14) The hide, finished drying, should now be at its softest. You should have another to sew and prepare for smoking; if you have one, begin sewing by putting tail end to tail end as symmetrically as possible and begin sewing together down one side, then the other. They don't need to be perfectly symmetrical or the same size—just sew; it will work. You need a skirt. The skirt will be sewn to the neck opening of your "smoke sack." The skirt is just a loop of fabric that will act as a buffer and funnel the smoke from the pit or pot into the hide sack to avoid scorching the hides. For sewing hides, I use cheap thread with a running stitch spaced half an inch apart. I don't have time to tightly sew these, but if you do, you will smoke for less time to achieve the same effect.
15) Smoke. Don't use wet material, but don't worry about which dry material you are using. Do not use lumber with visible black fleck mold on it. Punk is best.
Rip apart. Done.
To reiterate, the two key steps to make a hide soft are 1. When the hide is puckered with lye, break it and break it. 2. When thoroughly rinsed, coat those fibers by wringing with solution; wait a day, wring; wait a day, wring.
Show me the money - https://buymeacoffee.com/ropesuspenders